Come collegare un cavo: Mantenere i cavi sicuri e resistenti
I cavi sono importanti. Trasportano energia. Portano segnali. Ma i fili possono essere danneggiati. L'acqua può entrare. Può entrare la polvere. Il filo può essere tirato. Questo è cattivo. Un filo danneggiato non è sicuro. Potrebbe smettere di funzionare. Potrebbe causare un incendio. Questo è un grosso problema.
Vi preoccupate dei vostri cavi? Temete che non siano sicuri? Forse avete visto dei cavi danneggiati dall'acqua. O forse un collegamento non è andato a buon fine perché il cavo è stato tirato troppo forte. Riparare costa. Ci vuole tempo per ripararlo. Può anche essere pericoloso. Questo è frustrante. Avete bisogno che le vostre macchine funzionino. Avete bisogno che le luci rimangano accese. Avete bisogno di sicurezza.
Ma c'è un buono modo per tenere i fili al sicuro. Si chiama passacavo. A passacavo è come una porta speciale per il filo. Permette al filo di entrare in una scatola o in una macchina. Ma impedisce alle cose cattive di entrare. Tiene il filo ben saldo. Tiene fuori l'acqua e la polvere. Crea un collegamento sicuro. Apprendimento Come collegare un cavo il modo giusto è molto importante.
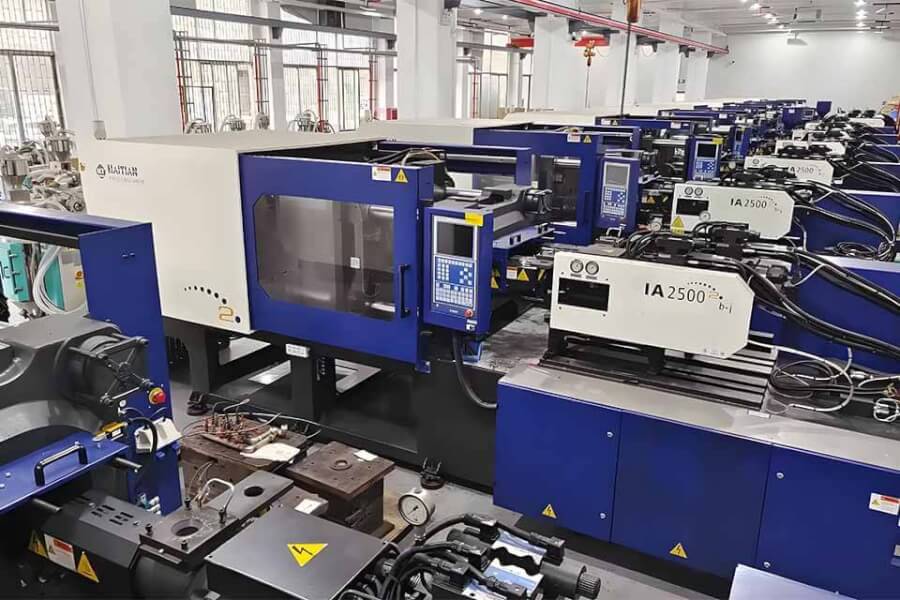
Siamo un Pressacavo produttore in Cina. Sappiamo che le ghiandole sono importanti. Facciamo prodotti di buona qualità. Offriamo servizio personalizzato per aiutarvi a ottenere l'esatta ghiandola di cui avete bisogno. E offriamo un prezzo competitivo. Vogliamo aiutarvi a risolvere i vostri problemi con i cavi in modo semplice e sicuro.
Il grande problema: cosa succede quando i cavi non sono collegati correttamente?
Immaginate un cavo che entra in una scatola elettrica all'aperto. Cade la pioggia. Senza una buona tenuta, l'acqua entra. Zap! La corrente va via. O, peggio ancora, si sprigionano scintille. Questo è il problema con un cattivo ingresso del cavo.
Ecco alcune cose negative che possono accadere:
- Danni da acqua: L'acqua entra nelle apparecchiature. Provoca cortocircuiti. Fa arrugginire le parti metalliche. Ghiandole resistenti alla corrosione aiutare a fermare tutto questo.
- Danno da polvere: Polvere e sporcizia entrano all'interno. Possono rendere appiccicosi gli interruttori. Possono bloccare le ventole di raffreddamento. Le apparecchiature possono surriscaldarsi.
- Estrazione del cavo: Se un cavo viene tirato, potrebbe staccarsi dal suo collegamento. Questo interrompe l'alimentazione o il segnale. Può danneggiare le estremità del cavo. Un buon pressacavo fornisce scarico della trazione. Ciò significa che trattiene il cavo in modo che non possa essere estratto facilmente. Tecniche di scarico della tensione sono fondamentali.
- Perdita della messa a terra: Per alcuni cavi, come Cavo SWA (steel wired armored)Il metallo esterno deve essere collegato alla terra. Questo si chiama messa a terra o messa a terra. Se il serraggio dell'armatura nella ghiandola è cattivo, il messa a terra del pressacavo potrebbe guastarsi. Questo è un rischio per la sicurezza. Corretto pressatura dei cavi armati è fondamentale.
- Danni al cavo: Il foro di ingresso potrebbe presentare bordi taglienti. Questi possono tagliare il rivestimento del cavo, chiamato isolante. Questo può portare a cortocircuiti. Protezione dell'isolamento dei cavi è un lavoro per la ghiandola.
- Perdite in aree speciali: In ambienti come le fabbriche alimentari o i laboratori, sono necessarie aree molto pulite. Una cattiva tenuta lascia entrare o uscire germi o sostanze indesiderate. Sigillatura ambientale è fondamentale.
Guardate questi dati. Dimostrano perché una buona ventilazione è importante:
| Area problematica | Perché succede | Impatto | Soluzione ghiandolare necessaria |
|---|---|---|---|
| Ingresso acqua/polvere | Sigillo errato, sbagliato Grado di protezione IP ghiandola utilizzata | Guasto dell'apparecchiatura, cortocircuito | Pressacavi con grado di protezione IP68, buona tenuta |
| Cavo estraibile | No scarico della trazione, premistoppa troppo allentato | Perdita di connessione, danni ai fili | Ghiere con forte serraggio |
| Guasto alla messa a terra | Povero terminazione dell'armatura, contatto metallico difettoso | Pericolo di sicurezza, scosse | Ghiandole a doppia compressione |
| Dimensioni del premistoppa non corrette | Non si usa calcolo della dimensione del pressacavo | Cattiva tenuta, scarso scarico della trazione | Corretto Formula di dimensionamento del premistoppa |
Gli studi dimostrano che molti fallimenti avvengono perché è stato scelto il premistoppa sbagliato o è stato montato male. Forse 3 volte su 10, il premistoppa sbagliato dimensioni del pressacavo è il problema. Questo fa sì che il problema ancora più grande. Si spendono tempo e denaro, ma la connessione non è ancora sicura o forte. È agitazione quando le cose non funzionano bene a causa di una piccola parte come una ghiandola.
È necessario un soluzione. È necessaria la ghiandola giusta. È necessario conoscere Come collegare un cavo correttamente. E avete bisogno di un fornitore di cui vi possiate fidare. È qui che entriamo in gioco noi. Come Pressacavo produttore in Cinaforniamo le parti necessarie per un funzionamento sicuro e duraturo. soluzione. Il nostro prodotti di buona qualità assicurano una buona tenuta e un'ottima tenuta. Il nostro servizio personalizzato vi aiuta a scegliere il tipo e le dimensioni giuste, come se aveste bisogno di un pressacavi multiforo. E il nostro prezzo competitivo rende la sicurezza accessibile.
Scegliere il proprio eroe: scegliere il giusto pressacavo
Prima di imparare Come collegare un cavoè necessario il giusto passacavo. Ci sono molti tipi di pressacavi. Scegliere quello giusto è il primo passo per una buona soluzione.
Ecco alcuni tipi comuni:
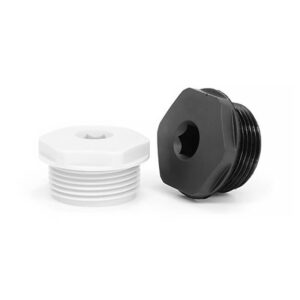
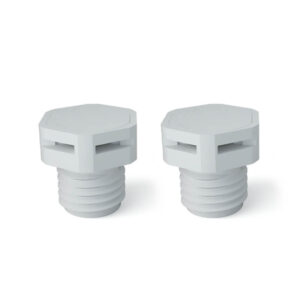
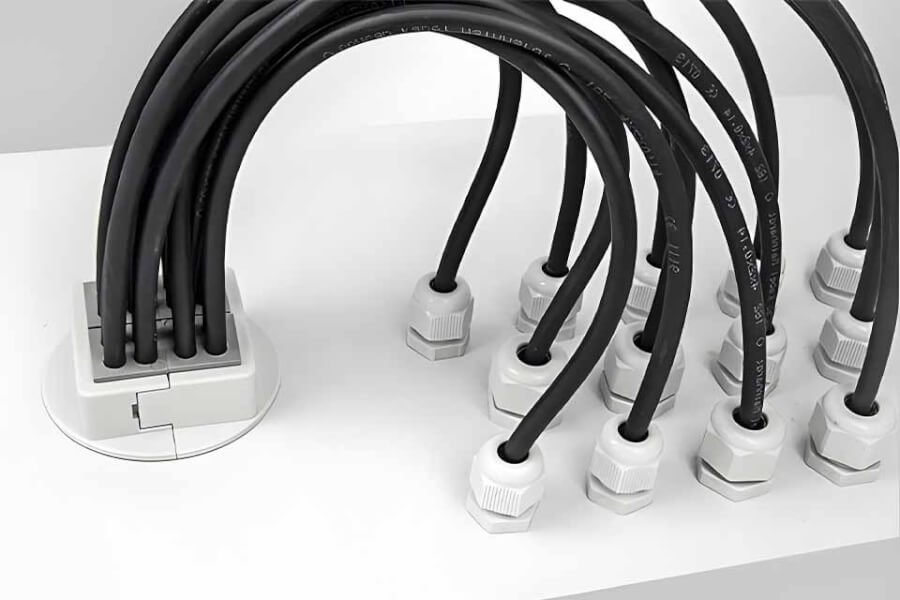
- Pressacavi in plastica/nylon: Sono leggeri. Non arrugginiscono. Ottimi per molti usi interni. Offriamo un'ottima pressacavi in plastica a prova d'acqua che chiudono ermeticamente.
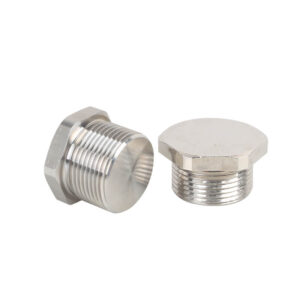
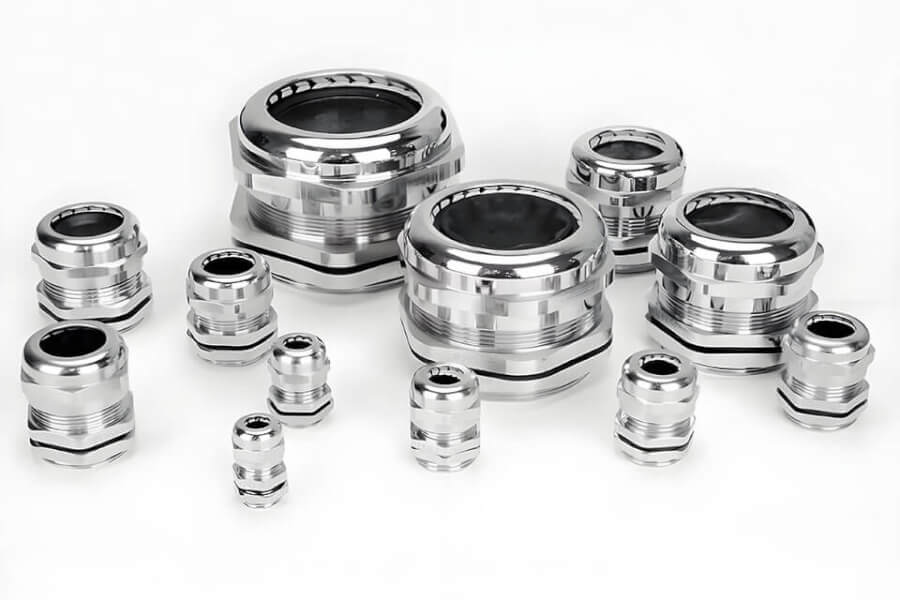
- Pressacavi in ottone: Molto resistente. Ottimo per le macchine e l'industria. Ghiandole in ottone durano a lungo.
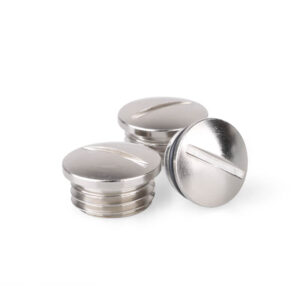
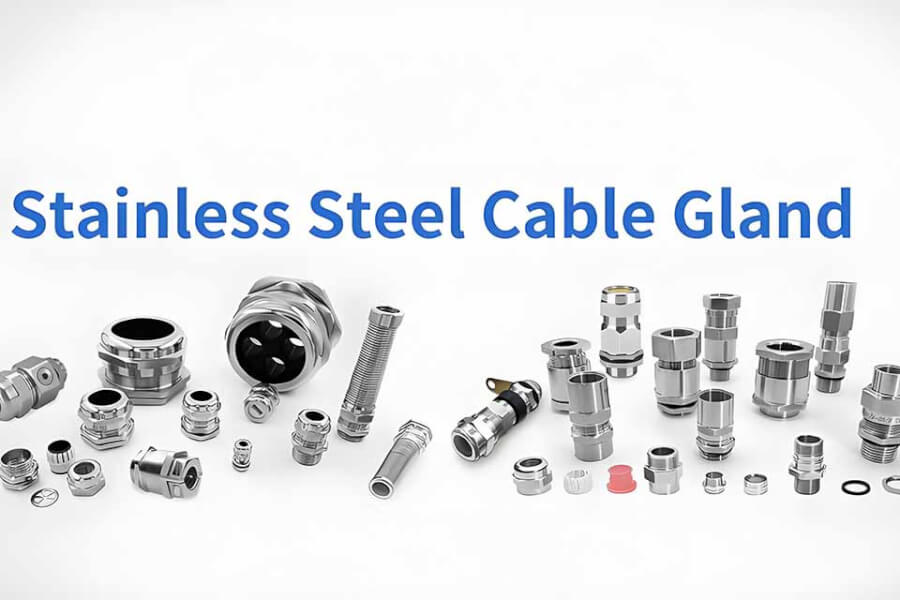
- Ghiere in acciaio inox: Ideale per i luoghi di ristoro o in prossimità del mare. Combattono molto bene la ruggine.
- Pressacavi corazzati (come i pressacavi SWA): Per cavi con rivestimento metallico (armatura). Aderiscono all'armatura per sicurezza e messa a terra. Cavi SWA a pressare ha bisogno di ghiandole speciali come ghiandole a doppia compressione.
- Pressacavi con grado di protezione IP: IP significa "Ingress Protection" (protezione dall'ingresso). Un numero più alto significa una migliore protezione da polvere e acqua. Pressacavi con grado di protezione IP68 offrono la massima protezione. Possono anche andare sott'acqua per un breve periodo. Il nostro pressacavo metallico impermeabile spesso hanno un elevato grado di protezione IP.
- Pressacavi EMC: EMC significa "Compatibilità elettromagnetica". Impediscono l'ingresso o l'uscita di disturbi elettrici attraverso l'ingresso del cavo. Sono ideali per i dispositivi elettronici sensibili.
- Ghiandole speciali: Ci sono anche pressacavi piatti, ghiandole di sfiato (lasciare che la pressione dell'aria si equalizzi), premistoppa antideflagrante (per le aree pericolose) e altro ancora.
Come scegliere:
- Quale tipo di cavo? È rotondo? Piatto? Ha un'armatura (Cavo SWA)? Questo determina il tipo di ghiandola di base.
- Quale dimensione del cavo? Misurare lo spessore (diametro) del cavo. Il pressacavo deve aderire perfettamente. Utilizzare un tabella delle dimensioni del pressacavo o un calcolo della dimensione del pressacavo strumento. Ottenere il Misura del diametro del cavo il diritto è la chiave. Possiamo aiutarvi con servizio personalizzato se si dispone di misure dispari.
- Dove verrà utilizzato? All'interno o all'esterno? Bagnato o asciutto? Polvere? Caldo o freddo? Vicino a sostanze chimiche? Questo decide il materiale (ottone, nylonacciaio) e il Grado di protezione IP necessario. Avete bisogno di premistoppa resistenti alla corrosione? Pressacavi resistenti alla temperatura? Ghiandole resistenti ai raggi UV?
- Quale materiale della scatola/macchina? Cercare di abbinare il materiale del premistoppa alla scatola (come un scatola di giunzione) per evitare problemi di ruggine.
- Esigenze speciali? Necessità messa a terra per l'armatura? Necessità EMC protezione? Necessità a prova di esplosione sicurezza?
Le dimensioni delle ghiandole sono importanti!
L'utilizzo di un premistoppa di dimensioni sbagliate è un problema. Un bocchettone troppo grande non è in grado di sigillare correttamente. Entrano acqua e polvere. Non riuscirà ad afferrare il cavo per scarico della trazione. Un pressacavo troppo piccolo potrebbe danneggiare il cavo o semplicemente non entrarci.
Guardate un tabella delle dimensioni del pressacavo. Spesso utilizzano Dimensioni dei pressacavi PG o metrico (come M20, M25). La tabella indica la gamma di diametri dei cavi e le dimensioni dei pressacavi. Ci sono anche Modelli di pressacavi per segnare i fori.
Confuso? Può sembrare molto. Ecco perché parlare con gli esperti è utile. Come Pressacavo produttore in CinaAbbiamo esperienza. Il nostro servizio personalizzato significa che possiamo guidarvi. Vogliamo che abbiate la ghiandola destra per il lavoro. Questo fa parte del soluzione offriamo, insieme a prodotti di buona qualità a prezzo competitivo.
Prepararsi: Strumenti e passi prima di iniziare
Ok, hai scelto la scelta giusta passacavo. Ora, prepariamoci all'installazione. Una buona preparazione evita gli errori. Rende il lavoro più facile e sicuro. Questo fa parte del soluzione a connessioni sbagliate.
Strumenti necessari:
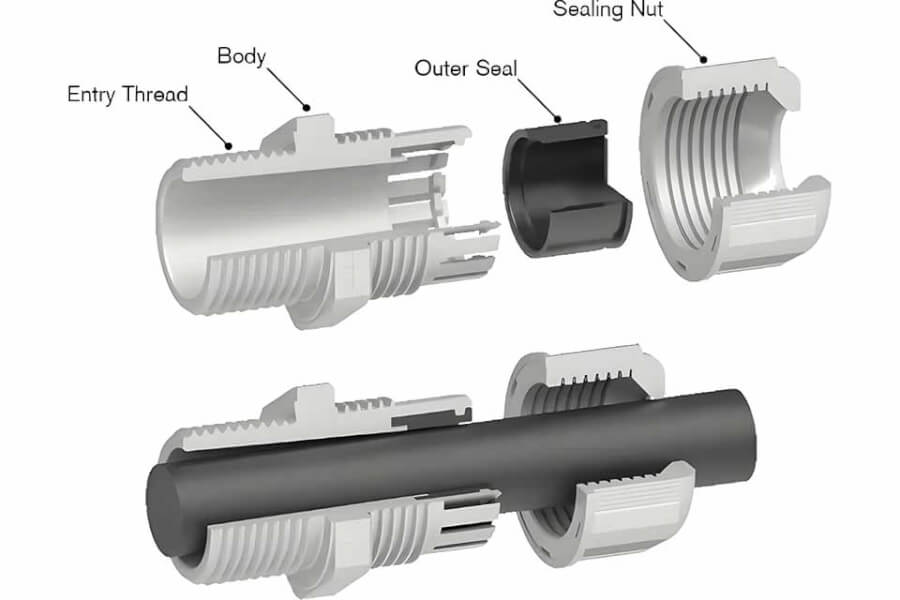
- Pressacavo: Il tipo e la dimensione giusta! Assicuratevi di avere tutte le sue parti (parti componenti come il corpo, la guarnizione, i dadi).
- Chiavi (chiavi): Di solito due. Uno per tenere il corpo del premistoppa, l'altro per stringere il dado. La dimensione dipende dal premistoppa. Utilizzando un Chiave dinamometrica per l'installazione del premistoppa aiuta a stringere al punto giusto: né troppo allentato, né troppo stretto.
- Spelafili: Per rimuovere il rivestimento esterno (guaina) del cavo.
- Coltello o taglierino: Per rifinire i fili dell'armatura se si dispone di Cavo SWA.
- Nastro di misurazione o righello: Per misurare la quantità di pelle del cavo da rimuovere.
- Pennarello: Per contrassegnare il cavo.
- Trapano o punzone: Per praticare il foro della giusta dimensione nella scatola o nel piastra premistoppa. Dimensionamento dei fori della piastra premistoppa deve corrispondere alla filettatura del premistoppa.
- File: Per smussare i bordi taglienti intorno al foro.
- Panno per la pulizia: Per rimuovere lo sporco dal cavo e dal pressacavo.
- Nastro elettrico: A volte è necessario.
- Occhiali di sicurezza: Proteggete sempre gli occhi!
Fasi di preparazione:
- Controllare l'area: Assicurarsi che il lavoro sia sicuro. Se necessario, staccare la corrente.
- Controllare la ghiandola: Guardate il istruzioni per il montaggio del pressacavo se li avete. Assicuratevi che tutte le parti siano presenti: il corpo principale, il anelli di tenuta, i dadi (dorsale, dado di compressione). Controllare il Grado di protezione IP è adatto alla posizione.
- Preparare la scatola/pannello:
- Assicurarsi che la superficie su cui si appoggerà il premistoppa sia pulita e piana.
- Realizzare il foro d'ingresso. Deve essere della dimensione giusta per la filettatura d'ingresso del premistoppa. Segnare e tagliare i fori nelle piastre dei pressacavi in base alle dimensioni e alla configurazione dei cavi.. Un foro troppo grande significa una cattiva tenuta.
- Utilizzare una lima per smussare eventuali spigoli vivi intorno al foro. Gli spigoli vivi possono danneggiare la filettatura del pressacavo o il cavo.
- Preparare il cavo:
- Pulire l'estremità del cavo. Lo sporco impedisce una buona tenuta.
- Decidere la posizione del pressacavo sul cavo.
- Misurare la quantità di guaina esterna (pelle) da rimuovere. Spesso le istruzioni indicano questa lunghezza (
Dim A,BoLunghezza della striscia). Questo è lunghezza di spelatura del cavo. È necessario un numero sufficiente di fili interni scoperti (conduttori) da collegare all'interno della scatola, più una lunghezza sufficiente per far sì che le parti del pressacavo si adattino correttamente. - Tagliare e rimuovere con cautela la guaina esterna utilizzando spelacavi. Non intaccare i fili all'interno!
- Se si utilizza un cavo armato (SWA): Questo è un passo fondamentale per pressatura dei cavi SWA.
- Dopo aver rimosso la guaina esterna, si vedono i fili metallici dell'armatura.
- È necessario esporre questi fili in modo che il pressacavo possa bloccarli per messa a terra.
- Tagliare con cura i fili dell'armatura alla giusta lunghezza utilizzando delle tronchesine. Fare molta attenzione a non tagliare i fili interni. Questo è terminazione dell'armatura del cavo.
- Rimuovere lo strato di allettamento interno (spesso in plastica) sotto l'armatura per esporre i nuclei interni isolati.
Se queste fasi di preparazione sono corrette, il lavoro vero e proprio Come collegare un cavo parte in modo molto più fluido. Evita problemi come guarnizioni difettose o scarsa messa a terra. Questo lavoro accurato fa parte del soluzione per una connessione affidabile. Il nostro prodotti di buona qualità funzionano al meglio se installati correttamente.
L'evento principale: Guida passo-passo su come fare il glanding di un cavo
Avete la ghiandola giusta. Avete gli strumenti. Avete preparato il cavo e la scatola. Ora è il momento delle fasi principali. Seguite questo Passaggio di cappa e contropunta passo dopo passo guida con attenzione. Questo processo è il fulcro soluzione per mantenere il vostro cavo sicuro e protetto.
(Nota: i premistoppa differiscono leggermente. Controllare sempre le istruzioni del produttore, se disponibili. Questi sono passi generali).
Fase 1: smontaggio del premistoppa (se necessario)
- La maggior parte dei premistoppa viene fornita assemblata. Potrebbe essere necessario svitare il dado posteriore (o il dado del cappuccio) e forse il dado principale.
- Mantenere le parti in ordine: Di solito corpo, guarnizione, dado/i. A volte ci sono rondelle o pezzi speciali serraggio dell'armatura anelli per Ghiandole SWA. Identificare il parti componenti.
Fase 2: Inserire le parti nel cavo
- Far scorrere prima il dado posteriore sul cavo. Assicurarsi che sia rivolto nel verso giusto!
- Far scorrere qualsiasi altra parte allentata (come anelli di compressione, coni di armatura per Ghiandole SWA) sul cavo nell'ordine corretto.
- Far scorrere il elementi di tenuta (come il guarnizioni in gomma o guarnizioni in plastica) sul cavo, se sono separati.
Fase 3: preparazione del corpo del premistoppa
- Assicurarsi che la filettatura del corpo del premistoppa principale sia pulita.
- Inserire la filettatura d'ingresso del corpo del premistoppa nel foro praticato nella scatola o piastra premistoppa.
- Se è presente un controdado per l'interno, avvitarlo leggermente per il momento.
Fase 4: inserimento del cavo nel corpo del pressacavo
- Spingere l'estremità preparata del cavo attraverso il corpo del pressacavo.
- Assicurarsi che il cavo passi attraverso tutto il percorso in modo che i fili interni (conduttori) raggiungono il punto in cui devono collegarsi all'interno della scatola.
- Per i pressacavi SWA: Questa fase è fondamentale per pressatura dei cavi armati.
- Assicurarsi che i fili dell'armatura esposti siano posizionati correttamente sul cono dell'armatura (se utilizzato).
- I fili dell'armatura devono essere intrappolati tra il cono e il corpo del pressacavo o un anello di serraggio. Questo garantisce una buona messa a terra e serraggio dell'armatura.
Fase 5: posizionamento della guarnizione
- Far scorrere la guarnizione principale (la guarnizione in gomma o plastica) nel corpo della ghiandola.
- Assicurarsi che sia ben saldo attorno al cavo. interno (se la guaina esterna è stata rimossa) o il esterno (se non è stata completamente rimossa per questo tipo di pressacavo). La guarnizione deve premere con forza contro il cavo per tenere fuori acqua e polvere. In questo modo si ottiene il sigillatura ambientale.
Fase 6: serraggio del corpo del premistoppa principale
- Se è presente un controdado all'interno della scatola, tenere il corpo del premistoppa con una chiave e stringere il controdado con un'altra. Stringetelo bene, ma non stringetelo troppo se dovete ancora regolare l'armatura.
Fase 7: Serrare il morsetto dell'armatura (per i pressacavi SWA)
- Se si tratta di un SWA ghiandolaDi solito c'è un dado centrale da stringere.
- Questo dado spinge il cono/anello di armatura sui fili di armatura, bloccandoli saldamente contro il corpo del pressacavo. Questo è fondamentale per messa a terra del pressacavo e ritenzione meccanica del cavo.
- Serrare saldamente con le chiavi. Controllare che i fili dell'armatura siano intrappolati uniformemente su tutto il perimetro.
Fase 8: Serrare il dado posteriore (dado di tenuta)
- Far scorrere il dado posteriore verso il corpo del premistoppa.
- Serrare il dado posteriore con una chiave tenendo fermo il corpo del premistoppa con un'altra chiave.
- Questo dado spinge sulla guarnizione, facendola stringere attorno al cavo. Questo completa il Grado di protezione IP sigillo.
- Stringere con forza per ottenere una buona tenuta, ma senza schiacciare il cavo. Utilizzare un Chiave dinamometrica per l'installazione del premistoppa se le specifiche sono disponibili. Controllare il posizione del dado posterioreAlcune ghiandole sono dotate di guide.
Fase 9: Controlli finali (ispezione dei pressacavi)
- Prova di rimorchio: Tirare delicatamente il cavo. Il cavo è sicuro? Il pressacavo dovrebbe fornire una buona scarico della trazione. Non deve muoversi facilmente.
- Controllo visivo: Osservare la guarnizione. Sembra compresso in modo uniforme intorno al cavo? L'armatura (se presente) è fissata saldamente? Il pressacavo è appoggiato alla scatola?
- Controllo della messa a terra (se applicabile): Utilizzare un multimetro per testare la continuità tra il corpo dell'armatura e il punto di terra principale. Questo conferma la buona messa a terra del pressacavo. Eseguire test dei pressacavi.
- Installazione della cuffia (opzionale): Se il premistoppa è stato fornito con un coperchio di plastica (sudario), farlo scorrere ora sul passacavo finito. In questo modo si ottiene una maggiore protezione.
Fatto! Avete imparato Come collegare un cavo. Seguendo questi passaggi si ottiene il soluzione al problemi di inserimenti di cavi non sicuri e inaffidabili. Utilizzo di prodotti di buona qualitàcome quelli della nostra azienda, rende questi passaggi più semplici e i risultati migliori.
Ops! Errori comuni e come evitarli
Anche con una guida, gli errori possono capitare. Conoscere i comuni Errori di installazione della ghiandola vi aiuta a evitarli. Evitare gli errori consente di risparmiare tempo e denaro e di evitare la agitazione di cose che vanno male.
Ecco i comuni problemi e le loro soluzioni:
- Problema: Dimensioni errate del premistoppa
- Perché succede: Indovinare le dimensioni, non misurare con precisione il diametro del cavo, non utilizzare un tabella delle dimensioni del pressacavo o Calcolo delle dimensioni dei pressacavi in excel.
- Agitazione: Scarsa tenuta (entra acqua/polvere!), assenza di scarico della trazione, cavo danneggiato. Le statistiche mostrano che ciò causa ~30% di guasti!
- Soluzione: Misurare due volte, scegliere una volta sola! Utilizzare un calibro per ottenere un'accurata Misura del diametro del cavo. Consultare il tabella delle dimensioni del pressacavo o utilizzare un Formula di dimensionamento del premistoppa. Chiedete aiuto al vostro fornitore (come noi!) - il nostro servizio personalizzato può assicurarvi la vestibilità perfetta.
- Problema: Scarsa tenuta
- Perché succede: Dado posteriore non sufficientemente serrato, guarnizione danneggiata (anelli di tenuta), superficie del cavo sporca, tipo di guarnizione errato per il materiale della guaina del cavo.
- Agitazione: Perdita di Grado di protezione IP, danni da acqua/polvere, guasti alle apparecchiature.
- Soluzione: Pulire la superficie del cavo prima di inserirlo. Ispezionare il elementi di tenuta per evitare danni. Serrare saldamente il dado posteriore (utilizzare le specifiche di coppia se disponibili). Assicurarsi che il materiale della guarnizione sia compatibile con la guaina del cavo (Selezione del materiale del premistoppa). Scegliere Pressacavi IP68 per le aree umide.
- Problema: Cattiva messa a terra (su cavo armato)
- Perché succede: Non si preparano correttamente i fili dell'armatura, i fili dell'armatura scivolano durante il serraggio, non si utilizza la corretta Tipo di pressacavo blindato (come ghiandole a doppia compressione), dado di serraggio dell'armatura allentato.
- Agitazione: Grave rischio di sicurezza (rischio di scosse elettriche!), malfunzionamento dell'apparecchiatura a causa di interferenze.
- Soluzione: Seguire Pressacavo SWA con attenzione. Assicurarsi che i fili dell'armatura siano puliti e posizionati correttamente sul cono/anello. Serrare saldamente il dado di serraggio dell'armatura. Utilizzare ghiandole a doppia compressione per ottenere risultati ottimali. Eseguire sempre un test di continuità (test dei pressacavi).
- Problema: Danni ai cavi durante l'installazione
- Perché succede: Serraggio eccessivo dei dadi (schiacciamento del cavo), scalfittura dei fili interni durante la spellatura, bordi taglienti sul foro di ingresso.
- Agitazione: Cortocircuiti, connessione inaffidabile, necessità di rifare l'intero lavoro.
- Soluzione: Usare un metodo corretto lunghezza di spelatura del cavo. Prestare attenzione durante la sverniciatura. Limare i bordi taglienti dei fori. Non serrare eccessivamente i dadi - utilizzare un Chiave dinamometrica per l'installazione del premistoppa se possibile. Buono protezione dell'isolamento dei cavi è fondamentale.
- Problema: Utilizzo di un pressacavo interno all'esterno
- Perché succede: Non controllare il Grado di protezione IP o le specifiche dei materiali. Cercando di risparmiare sui costi.
- Agitazione: Il pressacavo si rompe rapidamente a causa degli agenti atmosferici (ruggine, danni da raggi UV, infiltrazioni d'acqua). La connessione diventa insicura.
- Soluzione: Utilizzare sempre premistoppa adatti all'ambiente. Scegliere premistoppa in ottone, acciaio inox o Ghiandole resistenti ai raggi UV con un alto Grado di protezione IP (come IP66 o IP68) per ambienti esterni o umidi. Il nostro pressacavi metallici impermeabili sono progettati per questi punti difficili.
Evitare questi errori è semplice con la cura e i pezzi giusti. Il nostro prodotti di buona qualità sono progettati per un'installazione facile e affidabile. In combinazione con i nostri prezzo competitivo e servizio personalizzato, forniamo un servizio completo di soluzione per le vostre esigenze di pressatura dei cavi.
Controllo del lavoro: Verifica del collegamento con i ghiandole
Avete terminato l'installazione. Ottimo! Ma aspettate un momento. Come si fa a sapere che è stata fatta davvero bene? Il collaudo e l'ispezione sono le fasi finali del processo di soluzione. Garantiscono la problema è veramente risolto.
Ecco un semplice Lista di controllo del premistoppa per l'ispezione:
- Ispezione visiva:
- Osservate attentamente la ghiandola. È dritto? È appoggiato in modo piatto contro il piastra premistoppa o scatola?
- Controllare la guarnizione. Si vede che è schiacciata uniformemente intorno al cavo? Non ci sono spazi vuoti?
- Controllare i dadi. Sono stretti? (ma non eccessivamente serrati). Usare le chiavi per dare un'ultima delicata controllata.
- È il sudario montato correttamente (se utilizzato)?
- Controllo meccanico (Strain Relief):
- Con delicatezza, ma con fermezza, cercare di spingere e tirare il cavo vicino al pressacavo.
- Non deve muoversi facilmente all'interno o all'esterno. Il premistoppa deve fornire una buona ritenzione meccanica del cavo. Questo conferma la scarico della trazione funziona.
- Verifica elettrica (messa a terra - per cavi armati):
- Questo è molto importante per la sicurezza con Cavi SWA.
- È necessario un multimetro impostato per misurare la continuità (ohm, che assomiglia a Ω o che emette un segnale acustico).
- Toccare con una sonda del multimetro i fili metallici dell'armatura nel punto in cui entrano nel pressacavo (o il corpo stesso del pressacavo).
- Collegare l'altra sonda a un punto di terra noto e buono dell'apparecchiatura o della struttura dell'edificio.
- Il multimetro dovrebbe mostrare una resistenza molto bassa (vicina a 0 ohm) o emettere un segnale acustico. Ciò significa che la resistenza è buona messa a terra del pressacavo. Se mostra una resistenza elevata o non c'è nessuna lettura, la terminazione dell'armatura è cattivo - STOP e ripararlo! Si tratta di un grave problema di sicurezza problema.
- Controllo della tenuta (se il grado IP elevato è fondamentale):
- Per aree molto sensibili o dove IP68 è essenziale, a volte viene eseguita una prova di pressione o di spruzzatura. In genere si tratta di ambienti industriali. Per la maggior parte degli utilizzi, è sufficiente un buon controllo visivo e la verifica dell'utilizzo del giusto premistoppa.
L'esecuzione di questi controlli conferma che il vostro Installazione del pressacavo è sicuro e protetto. Vi dà tranquillità. È la parte finale del soluzionegarantendo la protezione del vostro Collegamenti elettrici.
Perché scegliere noi? Il vostro partner per le soluzioni di passacavi
Avete imparato perché un buon pressacavo è importante. Avete visto il problemi e agitazione causati da una cattiva installazione o da componenti sbagliati. Conoscete i passaggi per una corretta soluzione. Ora avete bisogno di un partner affidabile che vi fornisca i premistoppa di alta qualità di cui avete bisogno.
Noi siamo quel partner. In qualità di leader Pressacavo produttore in CinaSiamo impegnati ad aiutarvi ad avere successo.
Ecco perché lavorare con noi è la cosa migliore soluzione per le vostre esigenze di pressacavi:
- Risolutore di problemi: Prodotti di buona qualità
- Il più grande problema spesso sono le ghiandole che si guastano. Non si sigillano bene, si rompono o non forniscono un'adeguata scarico della trazione.
- La nostra soluzione: Ci concentriamo su prodotti di buona qualità. Utilizziamo materiali resistenti come ottone e durevole Nylon. Le nostre ghiandole sono fatte di precisione per garantire la tenuta (Grado di protezione IP68 dove necessario) e un serraggio sicuro. Il nostro Pressacavi RND sono testati per le prestazioni. Questa qualità risolve il problema problema di connessioni inaffidabili.
- Risolvi problemi: Servizio personalizzato
- A volte i pressacavi standard non sono adatti. Potreste avere cavi di dimensioni particolari, un ambiente difficile o necessitare di una caratteristica specifica, come ad esempio pressacavi multiforo. Trovare il pezzo giusto può essere agitazione.
- La nostra soluzione: Offriamo servizio personalizzato. Comunicateci le vostre esigenze. Possiamo aiutarvi con calcolo della dimensione del pressacavo, consigliare il tipo migliore (Ghiandole EMC, pressacavi corazzati, premistoppa di tipo flangiato), o addirittura di progettare un premistoppa personalizzato per la vostra applicazione unica. Questo servizio risolve i problemi di problema di non trovare la misura perfetta. Scoprite la nostra gamma, che comprende opzioni per scatola di giunzione integrazione.
- Risolutore di problemi: Prezzo competitivo
- Proteggere i vostri cavi non dovrebbe comportare costi eccessivi. I costi elevati possono essere un problemacostringendo a compromessi sulla qualità o sulla sicurezza.
- La nostra soluzione: Essendo un produttore con sede a Cina, possiamo offrire un prezzo competitivo. Gestiamo la nostra produzione in modo efficiente per mantenere i costi bassi senza sacrificare la qualità. Questo risolve il problema problema di vincoli di budget, rendendo la sicurezza accessibile. Ottenete un servizio affidabile pressacavi senza pagare troppo.
- Risolutore di problemi: Ampia gamma e competenza
- Non sono sicuro che sia necessario compressione singola o ghiandole a doppia compressione? Mi domando se Dimensioni dei pressacavi PG rispetto al sistema metrico? Necessità Riduttori per pressacavi o tappi pressacavo? Le scelte possono essere confuse.
- La nostra soluzione: Offriamo un'ampia gamma di ghiandole: metallo, plastica, impermeabile, Ghiandole SWA, pressacavi piatti, ghiandole di sfiatoe accessori. Il nostro team ha l'esperienza necessaria per guidarvi. Comprendiamo impianti elettrici e può fornire Guida esperta. Siamo tra i leader produttori di pressacavi in Indiadella catena di fornitura e a livello globale. Esplora i nostri principali passacavo pagina per vedere la varietà.
Lasciate che vi aiutiamo a risolvere i vostri problemi di connessione via cavo. Sceglieteci per:
- Affidabilità: Il nostro prodotti di buona qualità ultimo.
- Flessibilità: Il nostro servizio personalizzato soddisfa esattamente le vostre esigenze.
- Valore: Il nostro prezzo competitivo vi fa risparmiare denaro.
- Supporto: La nostra esperienza vi guida verso il giusto soluzione.
Contattateci oggi stesso. Lasciate che il nostro team fornisca il soluzione passacavi che mantiene le connessioni sicure, protette e perfettamente funzionanti.
Conclusione: Proteggere le connessioni, garantire il successo
Abbiamo appreso che Come collegare un cavo è più di un semplice passo tecnico. Si tratta di sicurezza. Si tratta di affidabilità. Si tratta di proteggere apparecchiature preziose e di evitare costosi tempi di inattività.
IL problema è chiaro: un pressaggio inadeguato dei cavi provoca danni all'acqua, infiltrazioni di polvere, connessioni allentate e rischi per la sicurezza, come una cattiva messa a terra. Questo provoca agitazione - frustrazione, spese e rischi.
IL soluzione si articola in tre parti fondamentali:
- Scegliere la ghiandola giusta: Comprendere i tipi (Ghiandole SWA, IP68, EMC), materiali (ottone, nylon), e correggere dimensionamento dei pressacavi.
- Installazione corretta: A seguito di un'attenta preparazione e di procedure passo-passo per premistoppa e terminazione, compreso il corretto sigillatura, scarico della trazione, E terminazione dell'armatura dove necessario.
- Utilizzo di parti di qualità: Approvvigionamento di premistoppa affidabili da un produttore di fiducia.
In qualità di esperto Pressacavo produttore in Cinaci impegniamo a far parte del vostro soluzione. Affrontiamo il problemi di scarsa qualità e di cattiva vestibilità da parte dell'offerta:
- Prodotti di buona qualità: Realizzati con precisione per prestazioni durature.
- Servizio personalizzato: Un aiuto su misura per assicurarvi una ghiandola perfetta.
- Prezzo competitivo: Rendere la sicurezza e l'affidabilità accessibili.
Non lasciate che i cavi mal collegati vi creino problemi. Utilizzate le conoscenze di questa guida. Scegliere il cavo giusto passacavo tipo, come forse Prodotti CMP stile o Hubbell compatibili. Seguite attentamente le fasi di installazione. E collaborate con un produttore che comprende le vostre esigenze e fornisce soluzioni affidabili. Proteggete le vostre connessioni e contribuirete a garantire il vostro successo.